The Rumbling Easter Egg
As Easter approaches, households everywhere are buzzing with the delightful chaos of holiday preparations. From decorating eggs to planning festive feasts, the anticipation is palpable. Among these traditions, the Easter Egg Hunt is the one that children look forward to, excited at the prospect of finding hidden eggs and enjoying the treasures held within them. But what if we told you that you could transform the traditional Easter Egg Hunt into an even more exciting experience with haptics?
The Rumbling Easter Egg is powered by our TITAN Core and our DRAKE haptic motors, creating extra tactile feedback that adds an exciting twist to tradition. Now, Easter Egg Hunting is more fun than ever.
What does it do?
Just like how you listen for the buzzing of your smartphone when you accidentally misplace it, this DIY project replicates that in a fun and playful way.
Just connect the egg to your device via Bluetooth, hide it, and play the audio we’ve included to see the egg come alive with vibrations as it anticipates discovery. Alternatively, choose your own tunes and observe as it jiggles and wanders across your desk. This is guaranteed to bring a new layer of fun to your Easter festivities.

Materials & Parts:
1x TITAN Core Development Kit (TITAN Core and LF and LFi Drake Haptic Motors)
1x Latching push button
2x M3x5 screws
1x 3.7v 350mAh LP552035 Lipo Battery
Wires
Heat shrink
Soldering Iron
3D Printer
Steps:
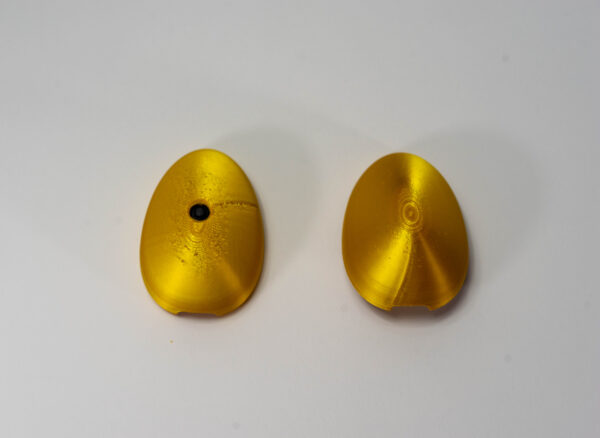
1. First, print the bottom and top half of the Rumbling Easter Egg (CAD Design here)
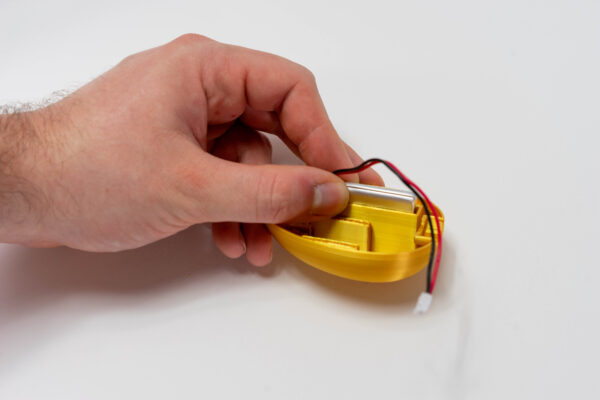
2. Next, attach the lipo battery into the shell. Make sure to press it firmly into the housing so that it doesn’t fall out.
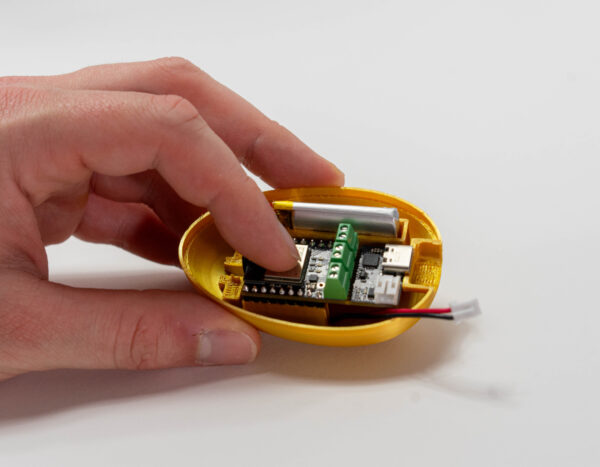
3. Insert the TITAN Core into the pre-made holes in the structure. The attached headers should friction fit there holding the Core in place.
4. Attach the DRAKEs onto the shells by removing the stickers from the bottom of the motor and pressing them firmly into the structure. Ensure that the DRAKE LFi is attached to the top half and the DRAKE LF is attached to the bottom half. Make sure to press and hold firmly so the adhesive can bond well to the plastic.
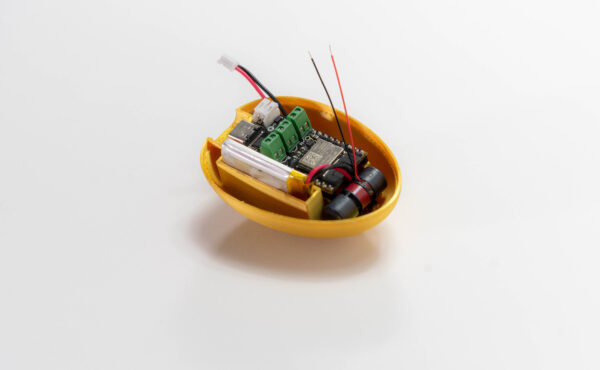
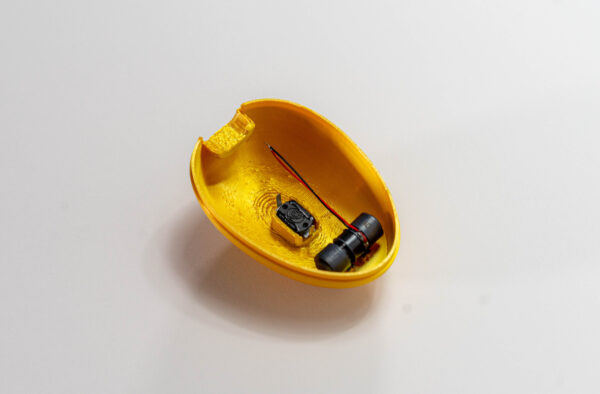
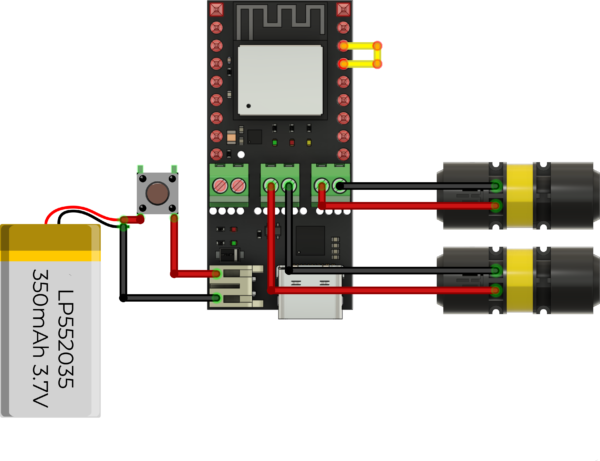
5. Wire in the switch into the power line of the lipo battery, and extend out the top shell motor wires.
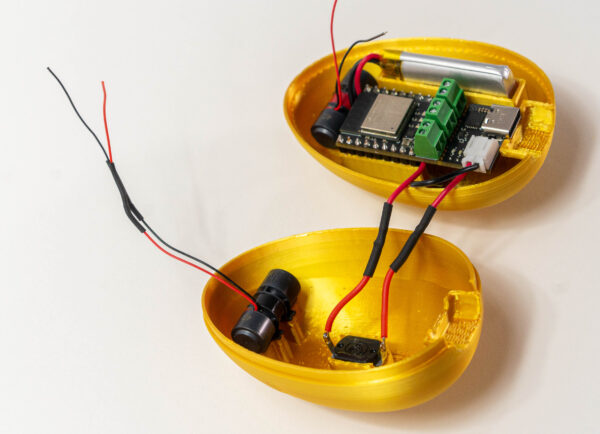
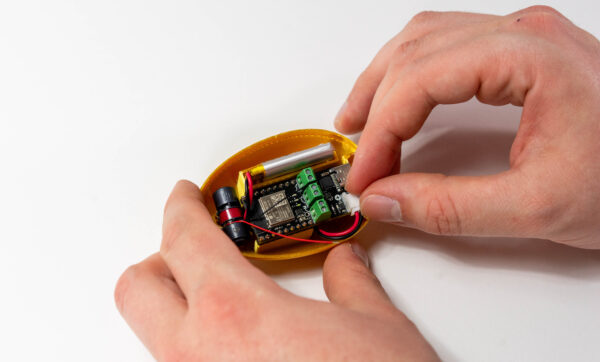
6. Insert the lipo battery connector into the built-in JST connector on the TITAN Core. Ensure that the lipo battery direction is correct.
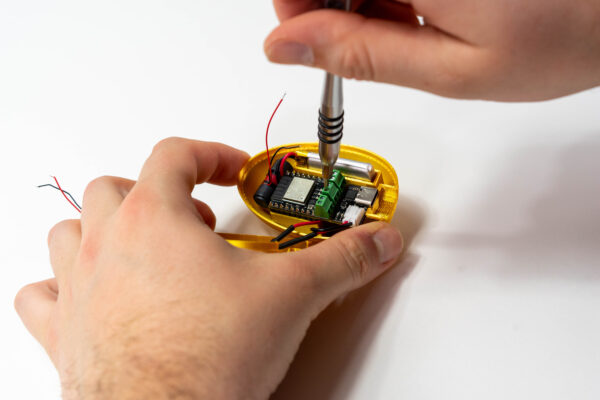
7. After, unscrew the L+ and L-terminals and the R+ and R-terminals on the Core. Insert the DRAKE Haptic Motor wires inside them. Screw down the terminals and ensure that there is a solid hold on the wires. Follow this wiring schematic below. Ensure that the pins IO22 and IO19 are jumped using a wire.
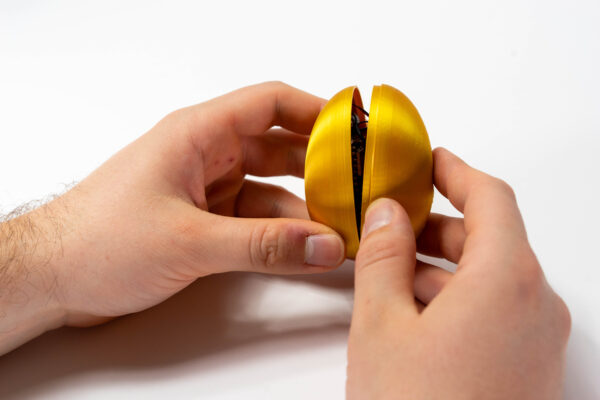
8. Close the two halves of the egg together.
To Use It
In order to use the egg, press the button once to turn it on. Then, open your device’s Bluetooth settings and look for a TITAN Device. After, connect to the device and ensure your volume is turned all the way up. Then hide the egg and play the YouTube playlist below!
To charge the Easter Egg, ensure that the device is turned on before plugging it in. The Easter Egg uses a USB-C cable to charge.
The Rumbling Easter Egg will hopefully bring an exciting twist to your Easter celebrations. It’s a game that everyone, kids and adults alike, are sure to enjoy. So make this year’s egg hunt a memorable one with the Rumbling Easter Egg.
Happy Easter!
Related Articles
Haptic Heart Jukebox
Resource: Bringing Halloween Decorations to Life with Haptics
Podcast: Pioneering the DIY VR Revolution with Lucas VRTech
